Imagine a world where you can create your own cloud server using just a small, affordable device like the Raspberry Pi. This is no longer a distant dream but a reality that thousands of tech enthusiasts are embracing today. The Raspberry Pi, with its incredible versatility and open-source capabilities, has revolutionized how we approach IoT (Internet of Things) projects. By setting up a Raspberry Pi IoT cloud server free, you can store data, control smart devices, and automate your home—all without breaking the bank. Whether you're a seasoned developer or a curious beginner, this guide will walk you through every step of the process, ensuring you harness the full potential of your Raspberry Pi.
Setting up a cloud server might sound intimidating, but with the right tools and guidance, anyone can do it. The Raspberry Pi, often referred to as the "Swiss Army Knife" of tech gadgets, offers an affordable and powerful platform for IoT projects. Unlike traditional cloud servers that come with hefty subscription fees, the Raspberry Pi allows you to create a free, customizable server tailored to your needs. This guide will not only provide step-by-step instructions but also offer valuable insights into optimizing your setup for maximum efficiency.
Our goal is to empower you with the knowledge and confidence to build a Raspberry Pi IoT cloud server free. From understanding the basics of IoT and cloud computing to troubleshooting common issues, we’ve got you covered. Whether you’re looking to automate your home, monitor environmental conditions, or develop cutting-edge applications, this guide will serve as your comprehensive resource. Let’s dive in and unlock the possibilities of your Raspberry Pi!
Read also:Dallas County Jail Mugshots The Untold Stories Behind Womens Incarceration
Table of Contents
- 1. What is a Raspberry Pi IoT Cloud Server Free?
- 2. Why Should You Build a Raspberry Pi IoT Cloud Server Free?
- 3. What Equipment Do You Need to Get Started?
- 4. How to Set Up Your Raspberry Pi for IoT Projects?
- 5. Can You Really Build a Cloud Server for Free?
- 6. Best Practices for Managing Your Raspberry Pi IoT Cloud Server
- 7. Common Challenges and How to Overcome Them
- 8. How Secure Is Your Raspberry Pi IoT Cloud Server?
- 9. FAQs About Raspberry Pi IoT Cloud Server Free
- 10. Conclusion
What is a Raspberry Pi IoT Cloud Server Free?
A Raspberry Pi IoT cloud server free is essentially a personal cloud server that you can build using a Raspberry Pi device. The Raspberry Pi is a credit-card-sized computer that can be programmed to act as a server, enabling you to store data, run applications, and connect IoT devices. Unlike commercial cloud services that charge monthly fees, this setup allows you to operate a server without recurring costs. By leveraging free and open-source software, you can transform your Raspberry Pi into a robust IoT hub capable of handling multiple tasks.
This concept combines the power of IoT, which connects physical devices to the internet, with cloud computing, which provides remote access to data and services. With a Raspberry Pi IoT cloud server free, you gain control over your data and applications while avoiding the financial burden of traditional cloud solutions. This makes it an ideal choice for hobbyists, educators, and small businesses looking to explore the world of IoT without significant investment.
For instance, you could use your Raspberry Pi to monitor temperature and humidity levels in your greenhouse, streamlining gardening efforts. Or, you might set up a home security system that sends alerts directly to your smartphone. The possibilities are endless, limited only by your imagination and the capabilities of the Raspberry Pi.
Why Should You Build a Raspberry Pi IoT Cloud Server Free?
Building a Raspberry Pi IoT cloud server free offers numerous advantages over traditional cloud services. First and foremost, it empowers you with complete ownership of your data. Unlike cloud providers who may store your information on servers located worldwide, a Raspberry Pi ensures that your data remains within your control. This is particularly appealing for individuals concerned about privacy and security.
Another compelling reason is cost-effectiveness. While commercial cloud services can rack up substantial bills over time, a Raspberry Pi IoT cloud server free eliminates these expenses. Once you’ve purchased the hardware and installed the necessary software, there are no ongoing fees to worry about. This makes it an attractive option for those on a tight budget or seeking long-term savings.
Additionally, building your own server fosters a deeper understanding of technology. As you work through each step—from assembling the hardware to configuring the software—you’ll gain hands-on experience that enhances your technical skills. This knowledge can open doors to new opportunities, whether in personal projects or professional development.
Read also:Carroll Oconnor The Iconic Legacy Of A True Tv Legend
What Equipment Do You Need to Get Started?
Before diving into the setup process, it’s essential to gather the right equipment. Here’s a list of items you’ll need:
- Raspberry Pi (Model 4 or later recommended)
- MicroSD card with at least 16GB capacity
- Power adapter compatible with your Raspberry Pi model
- WiFi dongle or Ethernet cable for internet connectivity
- HDMI cable and monitor (optional, for initial setup)
- Keyboard and mouse (optional, for local control)
While some components, such as the monitor and keyboard, are optional, they can simplify the initial configuration process. Once your Raspberry Pi is up and running, you can manage it remotely via SSH (Secure Shell), eliminating the need for physical peripherals.
How to Set Up Your Raspberry Pi for IoT Projects?
Setting up your Raspberry Pi involves several key steps. Begin by downloading the latest version of Raspberry Pi OS, a free operating system specifically designed for the device. Use a tool like Balena Etcher to flash the OS onto your microSD card. Next, insert the card into your Raspberry Pi and power it on.
During the first boot, you’ll be prompted to complete the initial setup, including configuring Wi-Fi and setting a password. Once the system is ready, you can install additional software to enhance its functionality. For example, Mosquitto is a popular MQTT broker that enables communication between IoT devices. By integrating such tools, you can transform your Raspberry Pi into a powerful IoT hub.
Can You Really Build a Cloud Server for Free?
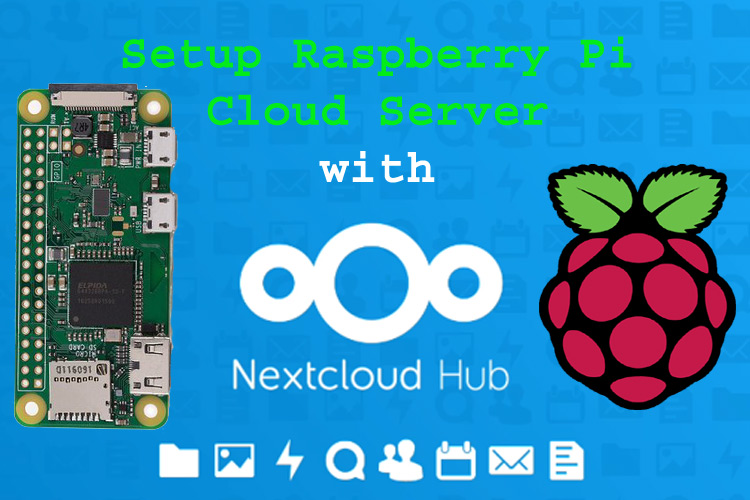
Yes, you absolutely can build a cloud server for free using a Raspberry Pi. While the initial purchase of hardware represents a one-time investment, the absence of subscription fees makes this solution remarkably cost-effective. Furthermore, many of the software tools required for setting up a cloud server are available free of charge. For instance, you can use Nextcloud, an open-source platform, to create a personal cloud storage system.
However, it’s important to note that "free" doesn’t mean "limitless." Your Raspberry Pi’s performance will depend on factors such as the model you choose, the amount of RAM, and the quality of your internet connection. Additionally, while the software itself is free, you may need to invest in external storage solutions if you plan to handle large amounts of data.
Best Practices for Managing Your Raspberry Pi IoT Cloud Server
To ensure your Raspberry Pi IoT cloud server free runs smoothly, follow these best practices:
- Regularly update the operating system and installed software to patch security vulnerabilities.
- Back up important data frequently to prevent loss in case of hardware failure.
- Secure your server by enabling a firewall and using strong passwords.
- Monitor resource usage to identify potential bottlenecks and optimize performance.
By adhering to these guidelines, you’ll maintain a stable and secure environment for your IoT projects.
Common Challenges and How to Overcome Them
As with any technology, challenges may arise when setting up a Raspberry Pi IoT cloud server free. One common issue is connectivity problems, which can often be resolved by ensuring proper Wi-Fi configuration or switching to a wired Ethernet connection. Another challenge is overheating, especially if your Raspberry Pi is running resource-intensive applications. To address this, consider investing in a cooling fan or heatsink.
Software-related issues, such as failed updates or corrupted files, can also occur. In such cases, refer to the official Raspberry Pi documentation or seek help from online communities. The Raspberry Pi community is vast and supportive, offering countless tutorials and troubleshooting tips.
How Secure Is Your Raspberry Pi IoT Cloud Server?
Security is a critical concern when operating a cloud server. Fortunately, there are several measures you can take to safeguard your Raspberry Pi IoT cloud server free. Start by changing the default SSH port and disabling password authentication in favor of public key authentication. This reduces the risk of brute-force attacks.
Additionally, keep your software up to date to protect against known vulnerabilities. Use a firewall to control incoming and outgoing traffic, and consider implementing two-factor authentication for added security. By prioritizing security from the outset, you can enjoy the benefits of your Raspberry Pi IoT cloud server free without compromising on safety.
Frequently Asked Questions (FAQs) About Raspberry Pi IoT Cloud Server Free
1. Is it legal to build a Raspberry Pi IoT cloud server free?
Yes, it is entirely legal to build a Raspberry Pi IoT cloud server free. As long as you comply with applicable laws and regulations, such as data protection and privacy laws, you’re free to create and operate your server as you see fit.
2. Can I use my Raspberry Pi IoT cloud server free for commercial purposes?
While you can technically use your Raspberry Pi IoT cloud server free for commercial purposes, it’s important to evaluate its scalability and reliability. For large-scale operations, a dedicated commercial solution might be more appropriate. However, for small businesses or startups, a Raspberry Pi-based server can serve as a cost-effective starting point.
3. How much does it cost to set up a Raspberry Pi IoT cloud server free?
The cost of setting up a Raspberry Pi IoT cloud server free primarily depends on the hardware you choose. A basic setup, including a Raspberry Pi 4, microSD card, power adapter, and necessary peripherals, can range from $50 to $100. Beyond that, additional expenses may arise if you opt for external storage or cooling solutions.
Conclusion
Building a Raspberry Pi IoT cloud server free is an exciting and rewarding endeavor that opens up endless possibilities for innovation. From automating everyday tasks to developing cutting-edge applications, this versatile platform empowers you to take control of your digital environment. By following the steps outlined in this guide and adhering to best practices, you can create a secure, efficient, and cost-effective cloud server tailored to your needs.
Remember, the journey doesn’t end here. As you continue exploring the world of IoT and cloud computing, you’ll discover new ways to enhance your setup and expand its capabilities. Embrace the challenges, learn from them, and let your creativity flourish. The future of technology lies in your hands—start building today!